Thursday, 30 November 2017

Punjabi Style Gobi Masala


                                              Punjabi Style Gobi Masala


     For  the weekend lunch, we decided to have jeera rice with some gravy. I had stocked cauliflower in my fridge, so made this gobi masala. It come out really well. The taste still lingers in my tongue.
     I had often tasted this gobi masala at north Indian restaurants, but after much hesitation i tried the recipe. It is so simple and easy, only a few ingredients are needed. 

Cuisine: Punjabi
Preparation Time: 10 minutes
Cooking Time: 20 minutes
Yields:serves 4 to 5 persons

Ingredients:
Cauliflower: 1 no of medium size
Onion: 2 nos
Green chilli: 2 nos
Tomato: 1 no
Chilli powder: 1 and 1/2 teaspoons 
Coriander powder: 3/4 teaspoon
Garam masala: 1 teaspoon
Turmeric powder: 1/2 teaspoon
Ginger garlic paste: 2 tea spoons
Salt to taste
Shahjeera: 1 teaspoon
Water as needed
Oil: 3 tea spoons
Kasuri methi: 1 teaspoon
Coriander leaves: 1 teaspoon finely chopped
Cashews: 8 to 10 pods
Cumin or Jeera powder: 1/2 teaspoon

Method:
1. Cut the cauliflowers into florets and put it in hot water with turmeric powder and a pinch of salt.
2. Finely chop one onion, slit the green chillis, chop coriander leaves and keep it ready.
3. Soak cashews in hot water. In the meantime, make a fine paste of the remaining onions and tomatoes. Keep it aside.
4. Place a pan on the stove over high flame, add 2 tea spoons of oil, when the oil  is hot, add shahjeera, slit green chillies. Fry it for a minute, add ginger garlic paste and saute till the raw smell of garlic goes off.
5. Add the chopped onions and saute till it becomes translucent.
6. Now drain the water and add in the cauliflower florets. Mix it well.
7. Add the onion tomato paste and saute it for few minutes.
8. Add chillipowder, coriander powder, garam masala and salt to taste. Mix it well.
9. Add 1 cup of water till it immerses the florets. Close the pan with a lid and let it cook.
10. Make a fine paste of the cashews. Keep it aside.
11. When the gravy thickness, add the cashew paste and cook for 5 to 7 minutes till the raw smell of cashews goes off.
12. Add jeera powder and crush kasuri methi in your palms and add it to the gravy. Let it simmer for few more minutes.
13. The oil may appear on the top of the gravy, put off the flame. Add coriander leaves and transfer it to serving bowl.
14. The gravy goes well with jeera rice, pulao, roti and naan.


Note:
1. The proportion for ginger garlic paste is 1 and 1/2 inch piece of ginger and 7 to 8 pods of garlic.


Wednesday, 29 November 2017

Apple Halwa


                                                         Apple Halwa


      Yes you read it right, indeed apple halwa some where I read, you can make halwas out of fruits, like banana, mango, pineapple and jackfruit. Once I tried with banana, it tasted good but the shelf-life was very short- only a day.
      The consistency of apple halwa is such that you can cut it into pieces, the texture is very similar to Bombay or Karachi halwa. Adding food colour gives it an appetising look, while the apple flavour gives the dish its uniqueness. 
      This is the season for apples and is available at an affordable cost. Our own Simla apples are apt for making this halwa.

Cuisine: Indian Sweet                                                                        Ratio
Preparation Time: 10 minutes                                                             1: 1/2
Cooking Time: 20 minutes                                                 Apple Puree: Sugar
Yields: 15 pieces 

Ingredients:
Simla apple: 3 nos of medium size
Sugar: 3/4 cup (Adjust to the sweetness of apple)
Ghee: 2 table spoons 
Chopped nuts: 1 teaspoon (Badam, Cashews, Raisins, etc)
Food colour: Orange red - a pinch
Cardamom: 2 pods finely chopped
Water: 1/2 cup

Method:
1. Peel the skin off the apple and cut it into pieces, discarding the seeds.
2. Make it into a puree using a mixie.
3. Place a pan or kadai, add 1 teaspoon of ghee and fry the nuts to a golden brown colour, take it out. Keep it aside.
4. In the same pan , add sugar and water. Once all the sugar melts, add apple puree and continue stirring on a medium flame.
5. Add ghee in regular intervals and keep on stirring in between, add food colour, cardamom and the nuts.
6.The halwa should not stick to pan, it should come out without sticking and this is the right consistency.
7. Take it out and put it in plate smeared with ghee. Let it cool.
8. Once it cools down to room temperature, cut it into pieces and store in an air tight container.


Note:
1. Apple halwa stays well for over a week.
 

Tuesday, 28 November 2017

Paneer Kati Roll


                                                   Paneer Kati Roll


          Sometimes spelt Kathi roll, is a street food dish originating from Calcutta (Present day Kolkatta). In its original form, it is a skewer-roasted kebab wrapped in a paratha. Today, mostly any wrap containing a filling enfolded in a roti is called kati roll. In native Bengali, the world kati translate to "stick" referring to how they were originally made.
          The kati roll comes in a large number of varieties. Innovation tends to be in two areas fillings and the warp. Common variants on the filling are egg, potato, paneer, mixed vegetables. I usually make potato filling or paneer filling. My son loves paneer in any curry, gravy or in a roll, which is basically paneer in any form.
         My roll stuffing consists of paneer tikka, some juicy vegetables like carrots, cabbage, capsicum, onions and tomato with a dash of chat masala. 

Cuisine: Fusion, Bengali
Preparation Time: 10 minutes
Resting time for Tikka: 20 minutes
Cooking Time: 15 minutes for tikka and roti
Yields: 10 rolls

Ingredients:

For Wrap:
Wheat flour: 2 cups
Ghee or Oil: 2 tea spoons
Sal to taste
Water as needed

For Filling:
Tikka - Paneer: 200 gms
Thick Curd: 2 table spoons
Chilli powder: 1/2 teaspoon
Coriander powder: 1/4 teaspoon
Garam masala: 1/2 teaspoon
Salt to taste
Kasuri methi: 1/2 teaspoon crushed

Veggies:
Thinly sliced onion: 1 no.
Thinly sliced capsicum: 1/2 no.
Thinly sliced carrot: 2 nos
Thinly sliced cabbage: 3 table spoons
Chat masala: 1/2 teaspoon
Vinegar: 1/2 teaspoon or Half lemon juice 
Salt a pinch for taste

For Green chutney:
Pudina or Mint: 1/2 cup tightly packed
Coriander leaves: 1/4 cup tightly packed
Onion: 1 no.
Green chilli: 2 nos
Salt to taste

Method:
1. Add wheat flour to a wide bowl, add ghee or oil. salt to taste, sprinkle water little by little while making it into a soft dough. Keep it aside for 10 minutes.
2. Take the thick curd in a vessel, add chilli powder, coriander powder, garam masala, salt, kasuri methi and mix it well.
3. Cut paneer into length wise strips and add the curd mixture and marinate it for 20 minutes.
4. Cut all the vegetables as mentioned, add salt, vinegar to it mix well and keep it ready.
5. For the green chutney, grind pudina, coriander, green chilli, onion into a fine smooth paste with salt to taste.Keep it aside.
6. Take the wheat dough, divide it into eight equal sized balls and roll out into chapathi or roti of even thickness.
7. Place a tawa on the stove over high flame, when it becomes hot, place the roti on it and cook on both sides, till light brown spots appear on it. Take it out and similarly make all rotis and keep it aside.
8. After 20 minutes of marinating the paneer, cook it in the tawa over a medium flame, tossing it occasionally till it turns golden brown. Keep it aside.
9. For assembling the kati roll, place a roti on a plate, smear the green chutney, place four to five paneer tikka pieces in the center vertically. Place the vegetables over it, sprinkle some chat masala, wrap it tightly.


10. Serve it wrapped in a tissue or aluminium foil for school or office.


Monday, 27 November 2017

Cheesy Corn Nuggets


                                            Cheese Corn Nuggets


    It has became a herculean task of deciding what should I give my son for his after school eats. Everyday he wants something different from the usual, with the foot-store in the fridge I manage to make some interesting foods. 
   You can always make the food more appetising by name you give to it. I didn't have bread crumbs for coating the nuggets, so thought of using the cornflakes to coat. Cornflakes made the nuggets more crispier and it stayed crispier for a long time. 

Cuisine: Fusion
Preparation Time: 10 minutes
Frying Time: 5 to 7 minutes for a batch of 4 nuggets
Resting Time: 20 minutes 

Ingredients:
Grated Mozzarella cheese: 1/2 cup
Finely ground pepper: 1/2 teaspoon
Mixed herbs (Oregano, Thyme, Etc)
Boiled salted Corn Kernels" 1/4 teaspoon
Maida: 2 table spoons
Salt as per taste
Corn flakes: 1/4 cup
Oil for frying

Method:
1. Boil the sweet corn kernel with a pinch of salt and drain the water. Keep it aside.
2. Grate the mozzarella cheese, add the pepper and mixed herbs to the cheese and add the corn kernels and mix well.
3. Make a thick batter of maida (ie) it should be like dosa batter consistency, with little salt.
4. Pulse once the corn flakes in a mixie jar and keep. It should be coarse.
5. Take the cheese corn mixture and make a lemon sized ball out of it. Make it into cylindrical shape.
6. Dip the cylinders into the maida batter and take it and roll it in the corn flake. Place it on a plate carefully.
7. Refrigerate it for 20 minutes.
8. Heat enough oil for frying in a kadai over medium flame.
9. When the oil is hot, drop the nuggets one by one gently into the oil and fry till it become golden brown colour, drain excess oil and take it out.
10. Serve it hot with spicy tomato ketchup.


Note:
1. You can add potatoes along with cheese for firm binding, if you are a beginner. I didn't use potato.
2. Mixed herbs is available in any super market under many brand names.
3. Be careful while adding salt, as these herbs may have dehydrated onion, garlic which may contain salt.


Saturday, 25 November 2017

Pav Bhaji


                                                          Pav Bhaji


    Popular snack among the youth next to pani puri. It can be had as breakfast or as evening snacks. It is very easy to make. It is a fast food dish from Maharastra, consisting of thick vegetable curry (Marathi: Bhaji) fried and served with a soft bread (Konkani: Pav). The dish originated in 1805's as a fast lunch time dish for textile mill workers in Bombay ( Present day Mumbai). Later it becomes so popular that it was served in restaurants. Pav bhaji has many variations like cheese pav bhaji, mushroom, Jain pav bhaji without onions and garlic and with plantains instead of potatoes.
    I made the usual popular one served in restaurants.

Cuisine: Maharashtrain
Preparation Time: 5 minutes
Cooking Time: 25 minutes

Ingredients:
Potato: 1/4 kg or 3 big ones
Beans: 10 to 12 numbers
Carrot: 1 big or 2 medium sized
Green Peas: 1/2 cup or 2 table spoons
Onion: 2 big ones
Capsicum: 1no
Tomato: 2 nos
Green chilli: 2 nos
Cauliflower: 1/4 of the flower of medium size
Ginger Garlic paste: 1 and 1/2 teaspoons
Oil: 2 tea spoons
Butter: 2 table spoons (Optional)
Garam masala: 1 table spoon
Chilli powder: 1 teaspoon
Coriander powder: 1/2 teaspoon
Turmeric powder: 1/2 teaspoon
Salt to taste
Lemon: 1 no
Pav Bun: 8 to 10 nos

Method:
1. Pressure cook skin peeled potatoes, carrot, beans, cauliflower, green peas, capsicum, tomatoes to mashy consistency. Chop one onion and green chillis and keep it aside.
2. When the pressure settles down, transfer it to a wide bowl and mash it using potato masher.
3. Place a pan or kadai or even 3 litre pressure cooker on the stove over medium flame. Add oil and half of the butter.
4. When it hot add the chopped onions and saute it for few minutes till it becomes translucent, add ginger garlic paste and fry till the raw smell goes off.
5. Now add the mashed vegetables, chilli powder, garam masala, coriander powder, turmeric powder, salt to taste and mix well.
6. When the curry is boiling, add slit green chillies, remaining butter and cook well till the oil floats. Put off the flame.
7. Finely chop the remaining onion and cut the lemon into wedges and keep it aside.
8. Place a tawa on the stove over high flame, cut the pav bun into half's and smear butter over and place the butter smeared side over the tawa and cook till it become golden colour. Similarly do for the other pav buns.
9. Take the bun out and serve it hot along with hot bhaji with chopped onions and lemon wedges.


Note:
1. If you are worried about calories in butter, you may add oil instead. But butter enhances the taste.
 

Wednesday, 22 November 2017

Aloo Paratha


                                               Aloo Paratha


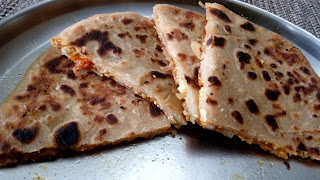
        It is the staple food of Punjabi's  and is famous in all over North India. Eating piping hot parathas on a rainy day was on my wish list for a long time, which got fulfilled during the recent rains in Chennai. We made and enjoyed it for breakfast. The parathas really came out very well and tasted awesome.

Cuisine: Punjabi
Preparation Time: 10 minutes
Resting Time: 20 minutes
Cooking Time: 3 to 5 minutes per parathas
Yields : 5 large parathas

Ingredients:
Wheat flour: 2 cups
Luke warm water: As needed to knead dough
Salt as per taste
Oil: 1 teaspoon

For Stuffing:
Boiled and Smashed potato: 3 big nos
Onion finely chopped: 1 big no
Green Chilli finely chopped: 2 ns
Ginger finely chopped: 2 teaspoon
Turmeric powder: 1/2 teaspoon
Chilli  powder: 3/4 teaspoon
Garam masala: 3/4 teaspoon
Salt to taste
Oil: 2 tea spoons 
Coriander leaves finely chopped: 2 tea spoons
Shahjeera or Jeera: 1/2 tea spoon (I added Shahjeera)
Asofoetida: 1/2 tea spoon

For frying parathas:
Ghee: 2 table spoons
Oil: 1 teaspoon

Method:
1. Take wheat flour/atta in a bowl, add salt and mix it well. 
2. Sprinkle lukewarm water little by little to make it into soft dough.
3. Apply a teaspoon of oil over the dough to make it non-sticky and cover the bowl with a lid. keep it aside.
4. Now for the filling, boil potatoes well and chop onions, ginger, green chillis and coriander leaves.
5. Place a pan on the stove over high flame, add 2 tea spoons of oil.
6. When the oil is hot, add jeera and wait till it crackles. Now add onions, green chillies, ginger and saute it for less than a minute.
7. Add the boiled mashed potatoes and mix well. Now add turmeric, chilli powder, salt, garam masala and mix till  everything gets blended.
8. Add coriander leaves and asofotedia. Stir once and switch off the flame and let it cool to room temperature.
9. Now take the dough and divide it into equal size balls. Keep it aside.
10. Take each dough balls and roll out into even sized chapathis or circular sheets.
11. Place the circular dough sheets one on another and stack it.
12. Fold it into cylinder and cut into roundels of equal size.
13. Flatten the roundel and roll out into thick chapathi of 2.5 inch diameter. Place the potato filling liberally.
14. Lift from one end of the edge and start pleating and folding and forming the pleats one by one towards the end. Join the pleats in the center and slightly flatten it.
15. Now roll into chapathi carefully. Similarly make all parathas.
16. Place a tawa on the stove over a high flame, put the paratha an apply little ghee over it. Cook it till small brown spots began to appear. Cook it on both sides.
17. Take it out and serve it hot with curd and pickle.


Tuesday, 21 November 2017

Punjabi Chole Masala


                                           Punjabi Chole Masala


          In December 2016, during Christmas holidays, we went to Amritsar where, we went to Golden Temple in Amritsar and since it was very crowded, we could not eat at Langer ( A canteen inside the temple premises, which provides free food for all devotees). They call it community kitchen, managed by volunteers.
          So we went to have breakfast at Bhaai Kulwanth Singh Kulchawala, a small eat out near temple. My son and my nephew relished the chole masala served along with piping hot stuffed Kulchas. My son become a ardent fan of Punjabi cuisine, he craved for Punjabi food, either subzis or parathas, which he wanted to be very authentic. 
          After many tests and trails, I was able to make 98% perfect to that recipe. So thought of sharing this in my blog. After testing this authentic chole masala, I found that they would have used ajwain seeds, asofoetida, lots of butter and ghee for cooking. 

Cuisine: Punjabi
Preparation Time: 20 minutes
Soaking Time: Over night
Cooking Time: 20 minutes for chole and 10 minutes for gravy
Serves: 4 to 5 persons

Ingredients:
White chick peas: 1 cup
Dip tea bag: 1 or 2 teaspoons of tea, tightly tied in a cloth
Green chilli: 2 nos
Tomato: 2 nos
Onion: 3 nos
Ginger: 1 1/2 inch piece - into julianes
Garlic: 9 to 10 pods
Oil: 2 teaspoons
Ghee: 1 table spoon
Garam masala: 1 teaspoon
Chilli powder: 1 teaspoon
Salt as per taste
Jeera or Cumin powder: 1 teaspoon
Ajwain seeds or Omam: 1/2 teaspoon
Asofoeida: 1 heaped  teaspoon (Liberally)

Method:
1. Soak the channa or chick peas overnight. In the morning pressure cook it for 68 to 10 whistles, with enough water till it immerse the chick peas, add in dip tea bag.
2. The colour of the tea would be evenly coated over the chickpeas. Keep it aside.
3. Grind 2 onions, tomato, garlic to a fine smooth paste.
4. Slit the green chillies and finely chop the remaining onions, cut the ginger into thin fine strips or julianes.
5. Place a pan on the stove over medium flame and add 1 teaspoon of oil, 1/2 tablespoon of ghee and heat it.
6. When it is hot, add ajwain seeds, jeera, ginger and green chillies. Fry for a minute.
7. Add the onions and saute it well for 2 to 3 minutes or till it caramelizes.
8. Now add the onion tomato garlic paste and cook till the raw smell goes off.
9. Add chilli powder, salt as per taste and the cooked chick peas along with the water used for cooking chick peas.
10. When it starts boiling, add the garam masala and mix well.
11. Add the remaining ghee and cook for 5 to 7 minutes till the oil/ ghee floats on the top.
12. Switch off and transfer it to a serving bowl. Garnish with the remaining ginger julianes.
13. This subzi goes well with Roti, Naan, Paratha and Batura.


Note:
1. Putting tea bag while cooking channa is very important, it not only infuse the colour to channa, it also add slight tea taste a tinge of bitterness to it.


Monday, 13 November 2017

Keera Vadai


                                                     Keera Vadai


         Popular snack in Tamilnadu, I ate this Keera vadai for the first time at Kalanai dam in Trichy in 2012.  A small food cart vendor at Kalanai dam was making keera vada. He was frying medu vada's with keerai in it. We tasted both medu & masala vadai with keerai, ie meduvadai using urad dhal, little rice flour and finely diced keerai and masala vadai using bengalgram dhal with keerai. 
          He also gave me the recipe, he mentioned in kilograms with proportions. So using the proportions, I devised it to smaller quantity and made using Channa dhal or Bengal-gram. It came out really well, very crispy outside but soft inside.

Cuisine: South Indian
Preparation Time: 15 minutes
Soaking Time: 3 hours
Cooking Time: 5 to 10 minutes for a batch of 5 vada's

Ingredients:
Bengal-gram dhal: 3/4 cup
Onion finely chopped: 1 no (Big) 
Green Chilli: 2 nos

Mula keerai: 1/2 cup tightly packed 
Saunf: 1/2 teaspoon
Salt as per taste
Red chilli: 3 nos
Ginger finely chopped: 1 &1/2 inch piece
Oil for frying

Method:
1. Soak Bengal-gram for 2 to 3 hours and then grind it in a mixie jar along with red chillies with little water into coarse paste. Take it out in a bowl. The batter should be very thick.
2. Finely chop the onions, green chillies, ginger and add to the Bengal-gram vada batter.
3. Clean and wash the greens well. Finely slice or chop it and add this to vada batter.
4. Add salt, sanuf and mix well.
5. Place a kadai or pan on the stove top with enough oil for frying over medium flame.
6. Take a lemon sized batter in your palms flatten it and gently drop it in the oil. Fry till becomes dark golden brown.
7. Drain excess oil and take it out.
8. Serve it hot.


Note:
1. Make sure the oil is in medium hot, so that the vada cooks even inside and remain crispy for a longer time.

Friday, 10 November 2017

Makkan Peda


                                                    Makkan Peda


               Most famous sweet of Arcot district, makkan peda. Looks very similar to Gulab jamun, but its taste is entirely different. The recipe is also similar, only the proportions vary. It is stuffed with dry fruits and nuts. One should have lot of patience while doing this makkan peda,  as it should be fried over low medium flame. Its preparation is time consuming, but the results are soft, yummy makkan pedas.
              There are 2 variants, one is dry and is look-alike of Badushah but is black or dark brown in colour, other  is juicy with sugar syrup, like gulab jamun. I tried the latter version. It came out really well, very soft, well cooked and yummy.

Cuisine: South Indian
Preparation Time: 20 minutes 
Cooking Time: 3 to 9 minutes per peda
Yields: 20 ns of medium size (ie, size of a lemon)

Ingredients:
Maida: 1/2 cup
Unsweetened Khoya: 1/2 cup 
Water if needed ( I did not use, the curd was enough)

Fresh Curd: 2 table spoons
Baking soda: 1/2 teaspoon
Oil for frying 
Dry fruit and nut: 2 table spoon (Cashews, Badam and raisin finely chopped) 

For Sugar syrup: 

Sugar: 1 1/2 cups
Water:  1 1/2 cups
Cardamom: 2 to 3 pods finely crushed


Method:
1. Crumble the khoya and add maida and mix it well, using your finger till the mixture resembles bread crumbs, add 1/2 tea spoon of baking soda.
2. Add curd and make it into a soft dough, if you feel it is dry. You can sprinkle some water to make it softer.
3. Keep the dough covered and leave it for 10 minutes, mean while chop all the nuts and dry fruits.
4. After 10 minutes divide the dough into equal sized balls.
5. Take the dough ball in your palms, flatten it. Place some chopped nuts in the center and close it carefully. Roll into balls and slightly flatten it. Keep it aside.
6. Likewise make all the rest of the makkan peda.
7. Place a frying pan and pour enough oil for frying.
8. Adjust the flame between low to medium and fry the makkan peda till it becomes dark golden brown and take it out.
9. Place a wide vessel on the stove, add sugar, powdered cardamom and water as mentioned and boil till it reaches one string consistency. Put off the flame.
10. Add the fried makkan peda into the syrup and soak it for 2 to 3 hours.
11.The Soft yummy makkan pedas are ready to eat.


Note:
1. The sugar syrup should reach one string consistency, to achieve perfect makkan peda.
2. The dough should be soft and slightly sticky but not very hard and firm.
3. Make sure that you fry makkan peda in medium flame so that it cooks completely. If you fry in high flame the outside will darken but the inner part may not be cooked.

Thursday, 9 November 2017

Keerai Thandu Poriyal


                                             Keerai Thandu Poriyal


                 This is the stem of mulakerai cut and made into poriyal, after plucking the leaves off the stem, the stem is then finely diced.
                 In my mom's place, they discard the stems after taking the leaves. But in my in-laws place, my mother-in-law used this stem for poriyal, at first I was very hesitant to taste it, but later when I tasted it, I liked it very much. So I learnt this recipe from my MIL. She does not use coconut scrapings whereas I do, that is the only variation.

Cuisine: South Indian
Preparation Time: 30 minutes
Cooking Time: 8 to 10 minutes

Yields: 1 bunch (Kerai kattu) Serves 3 persons 

Ingredients:
Mulaikerai Stem: 1 Bunch (One Kerai Kattu)
Dry Red Chilli: 2 nos
Mustard Seeds: 1/4 tea spoon
Onion: 1no finely chopped
Oil as needed
Salt as needed
Water just to sprinkle
Coconut Scraping: 1 table spoon
Curry leaves: A few number

Method:
1. Dice  the stem of mulakerai after plucking off all the leaves from it.
2. Finely chopp the onions.
3. Place a shallow frying pan over the stove on a medium flame.
4. Add 2 tea spoons of oil, when it is hot, add mustard seeds and let it splutter, then add 2 cut red chillis, add onions and stir fry it for a minute.
5. When the onions become translucent, add the kerai thandu and mix it well. Sprinkle some water and add salt. Close it with a lid. Let it cook for 5 to 8 minutes.
6. When the stem is fully cooked, add the scraped coconut and stir it well. Leave it for a minute or two.
7. Switch off the flame and transfer it to a serving dish.


Note:
1. Make sure to add less salt than making usual poriyal, as this stem has some salt content, so be cautions otherwise it may turn out very salty.
2. After adding coconut scraping, never close it with lid while it is hot. Let it cool completely, ie room temperature. If you close the poriyal while hot, it may spoil it. So make sure that it  cools.
 

Monday, 6 November 2017

Appam (Aappam)


                                                Appam (Aappam)


     A South Indian breakfast dish popular in Kerala, Tamilnadu and Srilanka, cooked in a pan (Shallow) unlike dosa on tawa, with less or no oil at all. The appam batter should be very watery, ie it should be thin, poury consistency.
        In Tamilnadu it is served with spicy hot gravies, like Kurma, where as in Kerala it is served with mildly spiced stew or Egg gravy (Vella Appam - Mutta Curry) or even Kadala curry.

Cuisine: South Indian                                                                  Ratio

Preparation Time: 5 minutes                                        Raw rice: Boiled rice: Urad dhall
Soaking Time: 4 to 5 hours                                               1 cup : 1 cup: 1 handful
Grinding Time: 25 minutes
Fermenting Time: Over night 
Coking Time: 3 to 5 minutes per appam 

Ingredients:
Raw rice: 1 cup
Boiled rice or Idli rice: 1 cup 
Urad dhall: 1 handful
Fenugreek seed: 1 teaspoon 
Water as needed for soaking and grinding
Refined oil if needed
Salt as per taste 
Baking soda/ Appa soda: 1/4 teaspoon (Optional) 

Method:
1. Add the rice (both raw and boiled rice), urad dhall and fenugreek in a vessel and immerse it with water and leave it to soak for 4 to 5 hours.
2. After 5 hours, grind it to a fine smooth paste by adding water as needed in between, preferably in a grinder.
3. Take it out in wide vessel, mix salt and ferment it over night.
4. In the morning take the batter, the batter would have raised and increased in volume, pour some water to make it into a poury consistency.
5. You can add baking soda if you wish, at this stage.
6. Place a shallow frying pan with handle on the stove top over a medium flame.
7. When the pan is hot, pour a ladle full of batter into the pan and tilt the pan and turn it in such a manner, so as to spread the batter on the walls of the pan. 
8. Close it with a lid and let it cook. When the appam starts to come off the walls of the pan, gently insert a spatula into the gap between the appam and the pan and gently take the appam out of the pan.
9. Make all the appams similarly.
10. Serve the appam hot with vegetable stew or kurma.


Appam Side dish Stew / Vegetable Stew (pronunc. Ishtoo)


                     Appam Side Dish Stew/ Vegetable Stew (pronunc. Ishtoo)


            Vegetable stew is a very good side dish for appam, it is less spicy and goes well with appam. Stew should be pronounced as Ishtoo. This mildly flavoured, yet rich stew is liked by all in our home.

Pressing and taking coconut milk is tedious for many, it may take a few more extra minutes, but the result is yummy stew.

Cuisine: Kerala 
Preparation Time: 20 minutes
Cooking Time: 15 minutes 

Yields: Serves 4 to 5 persons 

Ingredients:
Carrot: 1 no finely chopped
Beans: 50 gms finely chopped
Potato: 2 nos finely chopped
Peas or Sweet Corn: A handful 
Ginger: 2 inch piece  into fine julianes
Curry leaves: A few 
Oil as needed or 2 to 3 tea spoons (I used Coconut Oil)
Salt to taste

For Grinding:
Khuskhus: 2 tea spoons
Cashew: 8 to 10 nos
Cinnamon Stick: 1 inch piece 
Cardamom: 2 nos
Green Chilli: 3 nos


For Coconut milk Extraction:
Coconut: 1/2 no - Finely chopped or scrapped
Hot Water: 1/2 litre

Method:
1. Break the coconut. Take half of the coconut and take all the coconut flesh or meat out of the shell and finely chop it.
2. Add coconut to a mixie jar and grind it to a fine smooth paste.
3. Add the hot water and extract (Filter the pulp using filter by pressing the coconut pulp) coconut milk.
4. The first extract milk will be very thick. Keep it aside.
5. Likewise make second and third extract and keep it ready.
6. Cut the vegetables as mentioned and boil it in water till tender and keep it ready.


7. Grind the ingredients mentioned for grinding, into a fine paste.
8. Place a pan on the stove, add the oil when it is hot. Add curry leaves, ginger, onion and saute it well.
9. When the onions caramelize, ad the ground paste and stir well, till the raw smell of cashews and chillies goes off.
10. Add the third extract of coconut milk and stir well.
11. Add the boiled vegetables and mix it well.
12. When it starts to boil, add the second extract of coconut milk and leave it for 2 to 3 minutes.
13. Add salt as per your taste and finally add the 1st extract of coconut milk. Switch off the flame.
14. Transfer it to a serving bowl. Serve it with appam or idiyappam.


Note:
1. The ground paste should be cooked well before adding coconut milk, otherwise raw smell will spoil the taste of the stew.
2. After adding first coconut milk extract, you should not boil the stew. If you do so, it may curdle. So immediately you should switch off the flame after adding the milk.